|
Mother Nature got it right when she planned for the fruits of summer to ripen at different times. Could you imagine if they all came into season all at once? How would a girl ever manage? I mean, there are only so many hours and so many days to go berry picking and do baking and canning and make delicious drinks to sip on out on the patio. And we need extra hours to really enjoy those drinks and desserts on said patio. It would be absolutely crazily impossible. It would be berry mayhem! Luckily - thank you Mother Nature, we ease into the season with spring rhubarb, which is not even a fruit - but it may as well be in my books because it seems to get way more attention disguising itself with other fruit in pies and crumbles, then come strawberries, cherries, raspberries, blackberries, pears, blueberries and finally apples. Well, raspberry season is wrapping up out here where we live and these tender little berries are the most delicate of all the summer fruit that I can think of. A little bit tart and little bit sweet, and always so juicy, raspberries are one of my favourites. The problem is that they ripen so quickly and crush so easily, you really just have to freeze them or use them up as quickly as you can. I actually can't think of a time I had to freeze raspberries, I pop them in my mouth like candy, I can't imagine raspberries rotting on my watch! Which brings me to this recipe. I have been promising my husband a pie for ages. A good old fashioned pie. As I searched through my fridge I came across the leftover coconut milk from a recipe I made the other day. As any thrifty girl would do I quickly started thinking of how I was going to use it. Ideas usually just pop in my head, and I took one look at the pile of raspberries and the wheels started churning. I often feel like peaking into the depths of my refrigerator is like being on the next episode of Chopped. "All right contestants, for this challenge you need to make a desert with canned coconut milk, eggs, ripe raspberries and flour. You have only 30 minutes. Go!" So, there you have it, Raspberry Coconut Custard Pie. I hope my husband enjoys his pie! ❤️ INGREDIENTS - 1 pie shell, homemade or store bought - 2 egg yolks - 1/4 cup of all purpose flour - 1:4 cup of sugar - 1 tsp vanilla extract - 1/2 cup of milk - 1/2 cup of coconut milk - 2 cups of fresh raspberries - 1/4 cup shredded coconut DIRECTIONS 1. Prepare the pie crust as per your favourite recipe or the directions on the package of store bought pie shell and bake until golden brown, and let cool completely 2. In a mixing bowl combine egg yolks, flour and sugar and beat together until creamy 3. Add vanilla to the mixture and stir until combined 4. In a medium saucepan mix together the milk and the coconut milk and stir over medium heat until the milk is just beginning to boil and promptly take the pot off the heat * it's okay at the beginning to have chunks of coconut cream, it will melt down after a few minutes of stirring, 5. Add the hot milk, about 1/4 cup at a time, to the ingredients in the bowl and whisk continuously until you have poured in all of the milk and whisk until there are no lumps 6. Pout the mixture back into the pot and cook over medium-low heat whisking continuously until thickened, about 5-7 minutes, you want the custard to coat a spoon dipped in without dripping 7. Remove the pot from the heat and stir in most of the shredded coconut, save some coconut for decorating the top of the pie 8. Transfer the mix to a bowl and let cool completely - warm custard will make your pie crust soggy! Place Saran Wrap/plastic wrap directly on top of the custard to preventthe top from forming a hard crust 9. Spoon the custard into the pie shell and top off with the raspberries and the remaining coconut 10. Serve immediate or store in the refrigerator until ready to serve and enjoy! * custard is best served the day that it is made
0 Comments
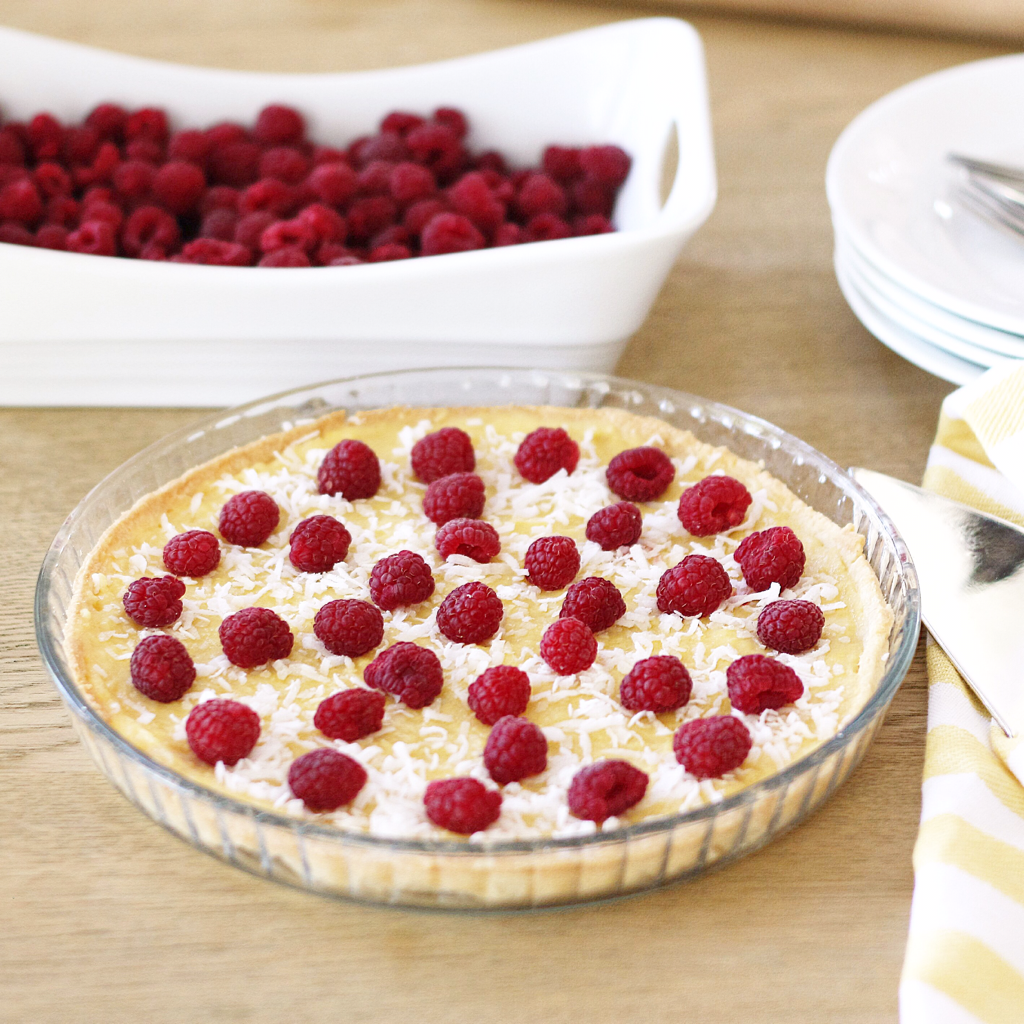
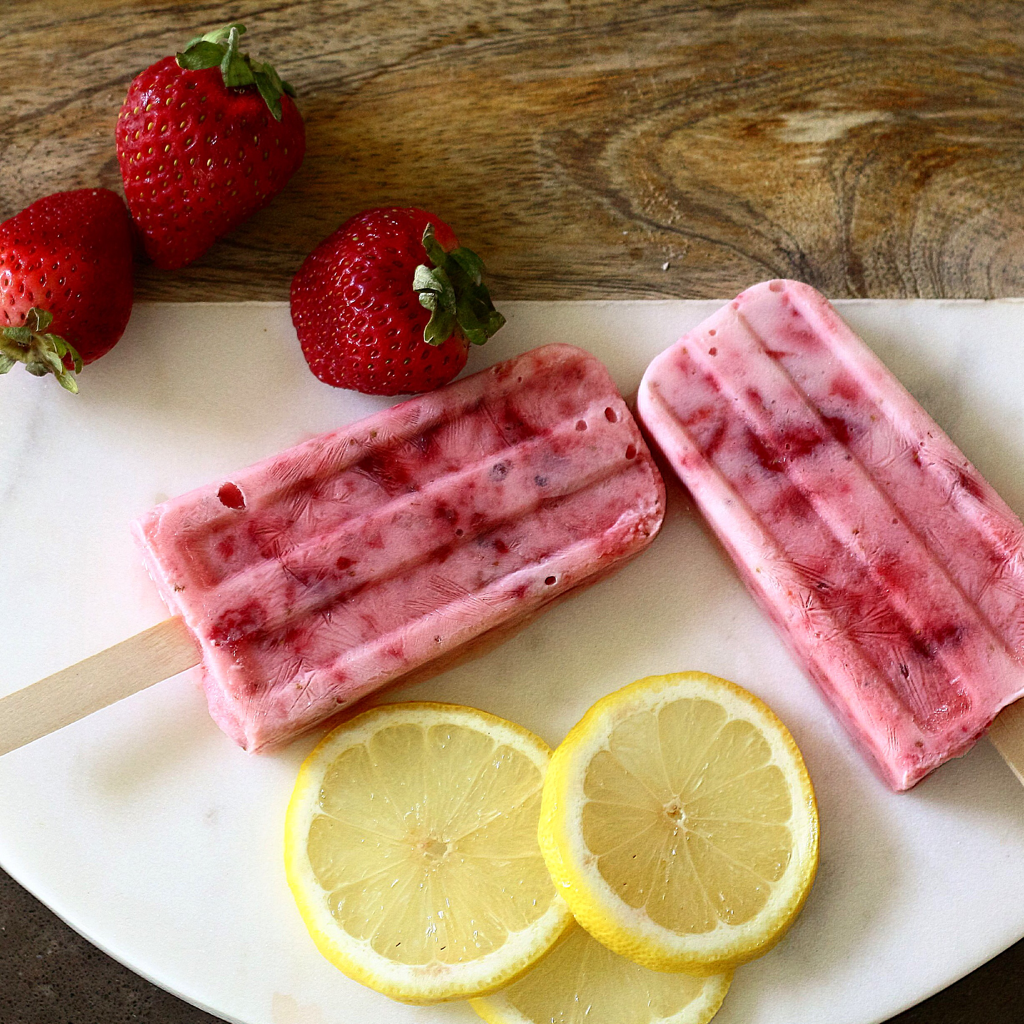
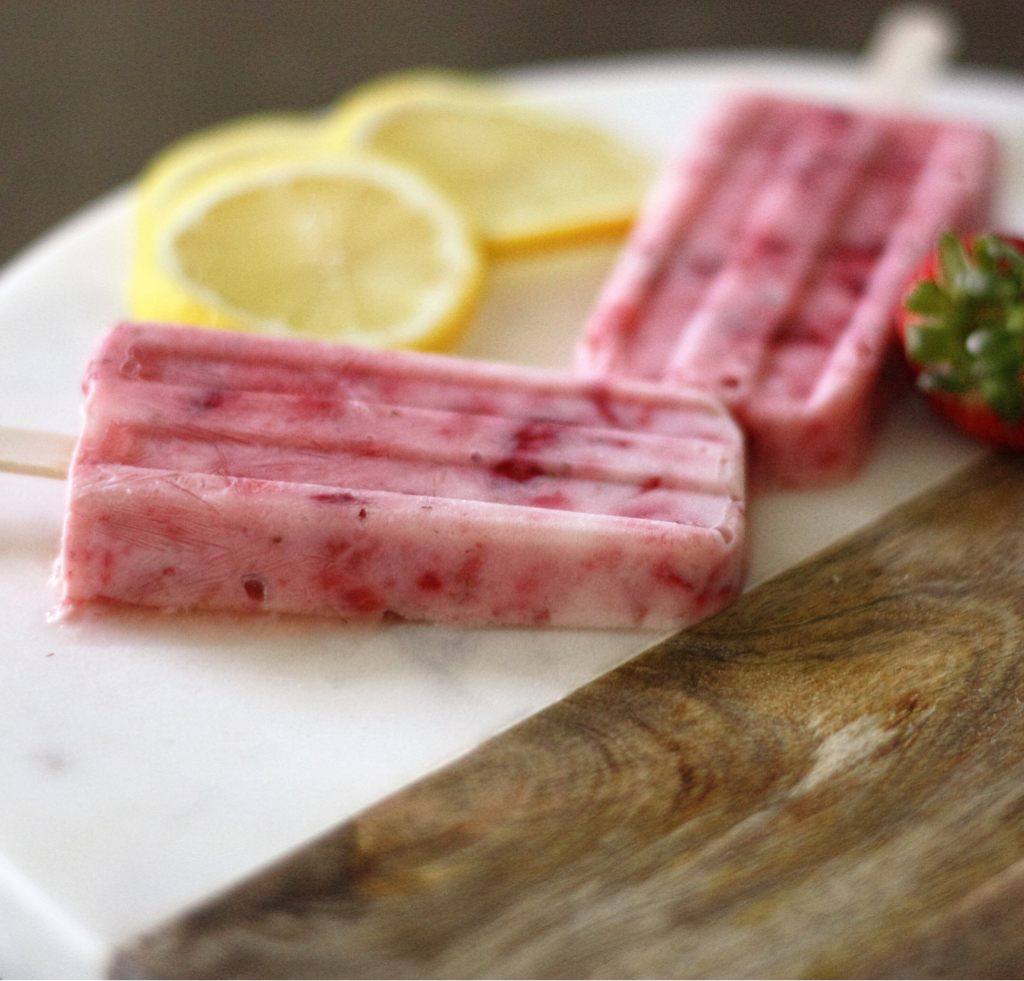
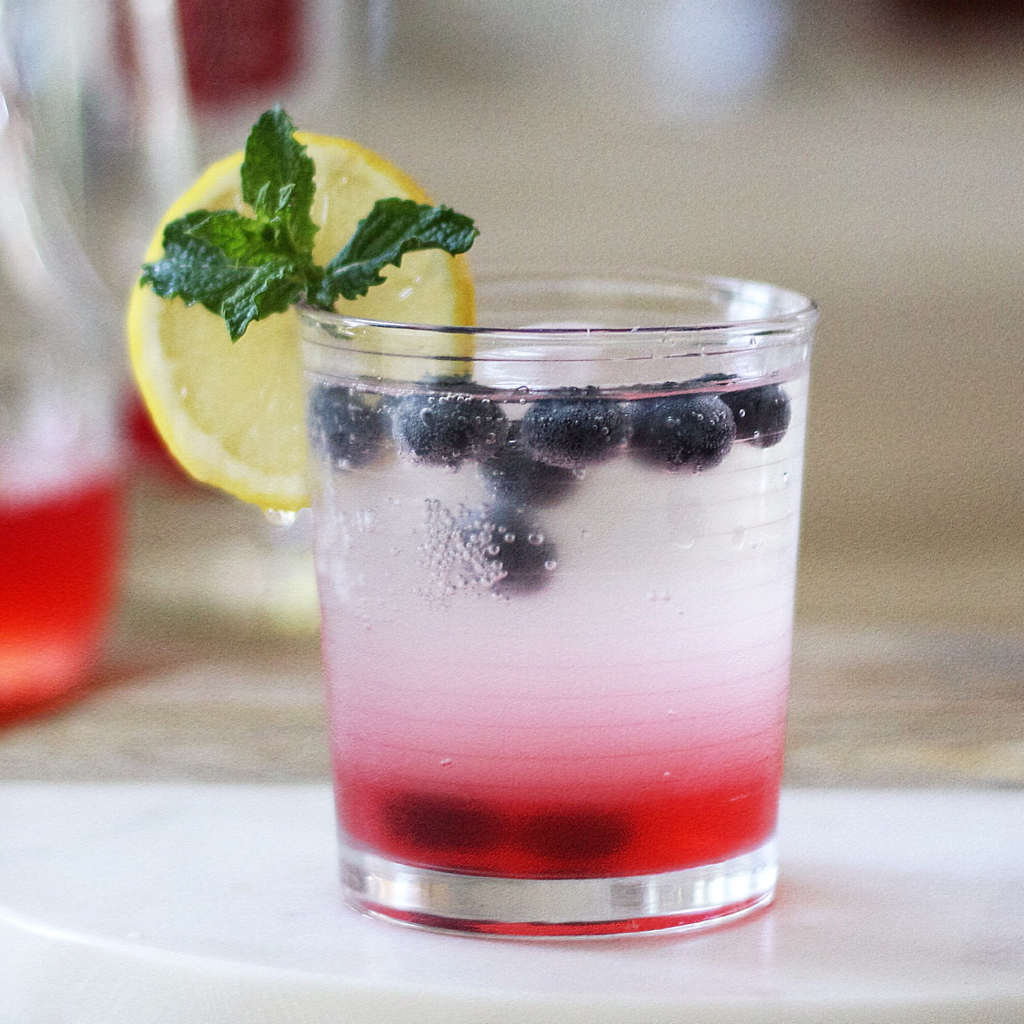
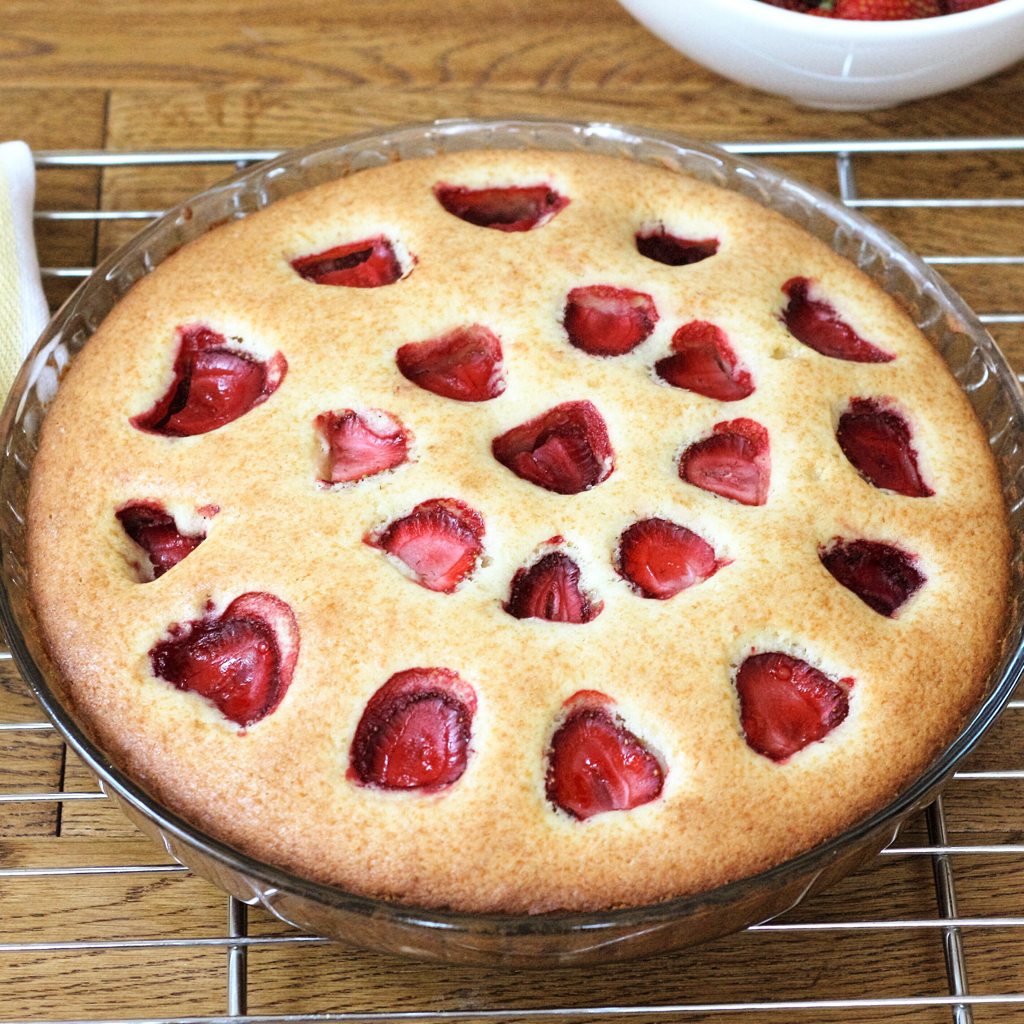
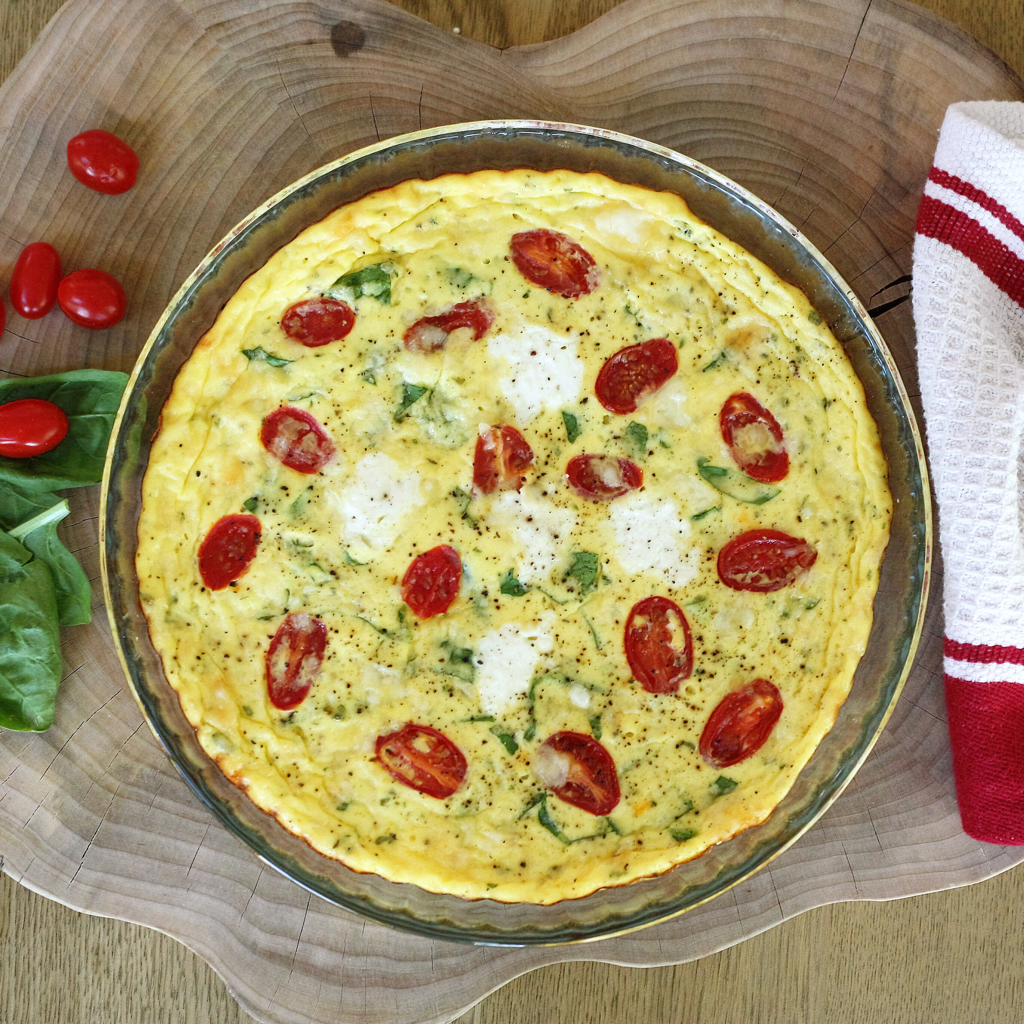
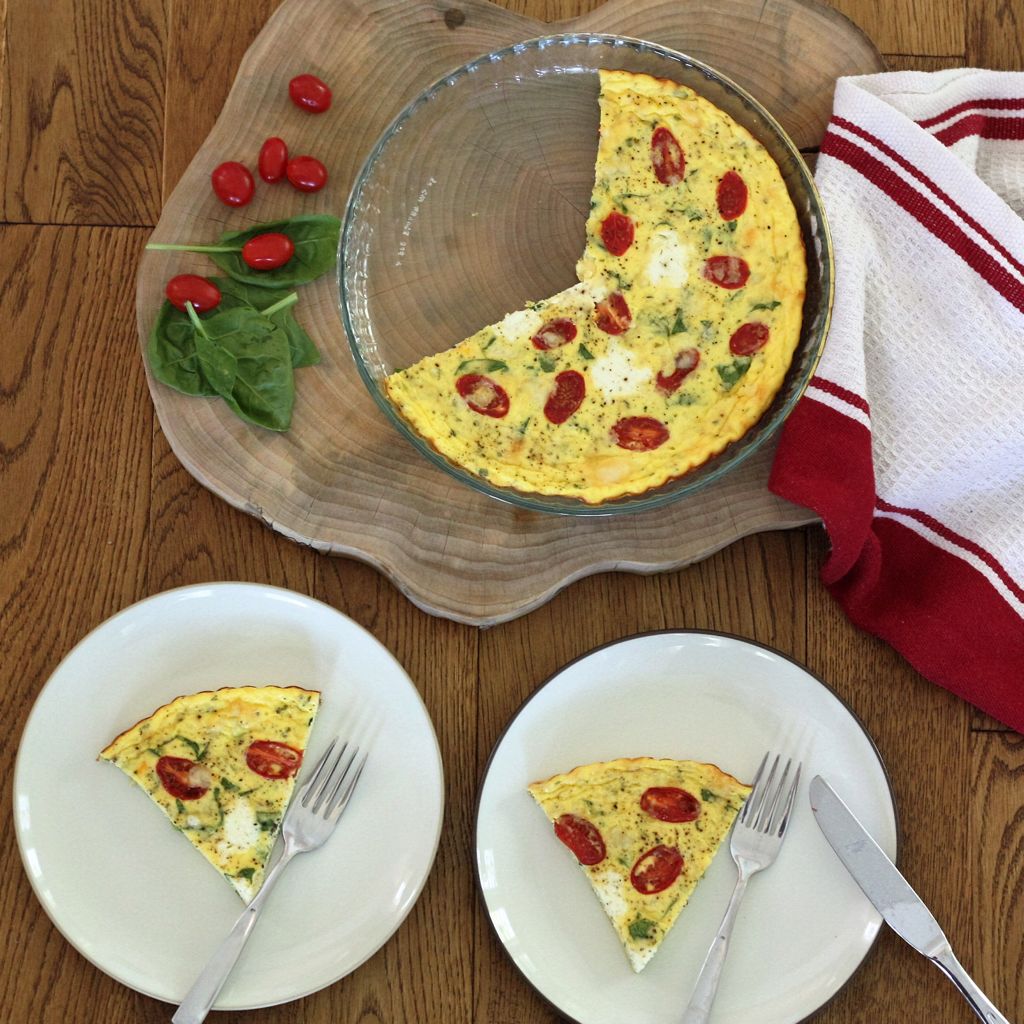
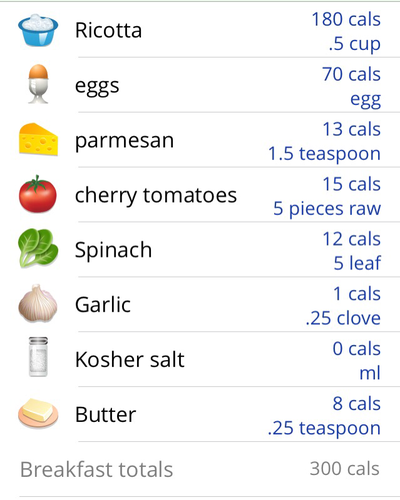
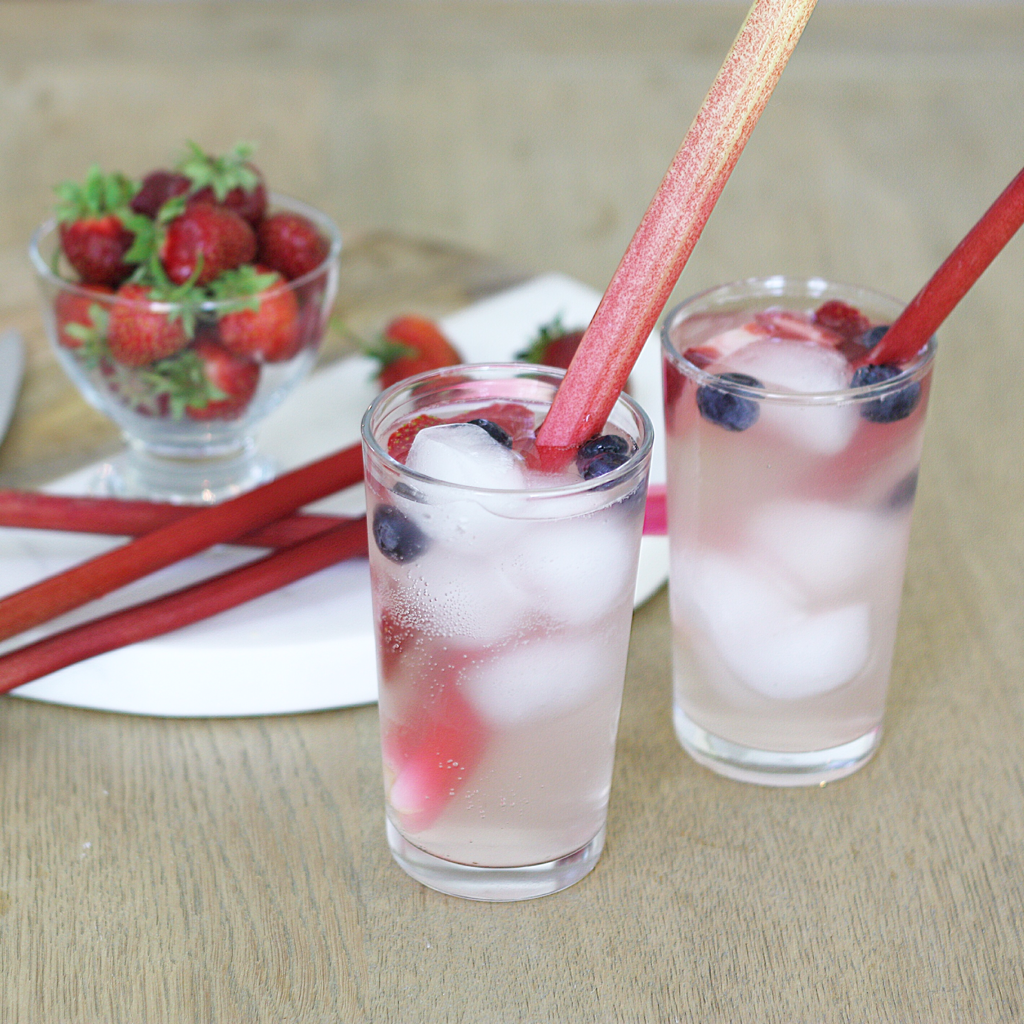
Popsicles are the ultimate summer treat for kids of all ages, and you know it - even for big kids like me! When I was growing up our dad always had popsicles for us in the summer. I have to say, we were pretty lucky. We usually had the Popsicle brand ones, you know the ones - they had two sticks and you could break it in half so you really had two popsicles in each wrapper. I don't remember my brother, sister and I fighting too much over who got which flavour, but I do remember that there was pink, purple, orange and lime green. Thinking back now I also have no clue what flavor the pink one was. Was it cherry, strawberry or raspberry? Hmmm.... I have no idea! Anyway, there really wasn't much nutrition in those popsicles, it was after all, just sugar, water and food colouring, but we loved them anyway! Here we are today and I know so much more about health and nutrition. If you can make a treat more healthy, then why not? I would argue that you could actually serve these popsicles for breakfast. It's basically a smoothie frozen into ice pop molds, and that's pretty healthy because the only ingredients are strawberries, banana, lemon juice and greek yogurt. So you can call it a smoothie on the go! But I don't really recommend grabbing this for your morning commute, I won't promise that you won't drip on your drive! Yikes! With popsicle molds available just about everywhere these days anyone can make healthy and delicious ice pops at home. No fancy equipment or techniques required, just good food and some sticks. I posted two methods in the Instructions because you can whip them up in a flash in a blender or mix them by hand in a bowl, both methods work great. The blender is easier and faster but sometimes the cleanup is more work. The by hand method takes a little elbow grease but then the clean up is quick.... I'm actually divided on this one! INGREDIENTS - 1 1/2 cups of hulled and cut strawberries - 1 ripe banana sliced - 2/3 cup plain or strawberry yogurt - juice of 1/2 lemon DIRECTIONS Blender Method 1. In a blender mix strawberries, banana, yogurt and lemon juice for 3 seconds and stop... look and see if the strawberries are chopped, you just want to to start to blend without turning it into a smoothie 2. Blend for 3 more seconds if needed 3. Pour into ice pop molds and pop in the freezer until frozen By Hand Method 1. In a bowl smash strawberries and banana with the back of a fork until they're smooshed into pieces 2. Add yogurt and lemon juice and stir 3. Pour into ice pop molds and pop in the freezer until frozen Makes 8 3oz ice pops Serve frozen and enjoy! INGREDIENTS - 8-10 stalks of rhubarb - fresh water - 1 cup of sugar - juice of 1 lemon - 1 bottle of sparkling water - vodka - lemon slices and blueberries for garnish * omit the vodka for an alcohol free beverage DIRECTIONS 1. In a medium saucepan bring 4 cups of water to boil 2. Chop the rhubarb and add to the pot of boiling water and reduce to medium heat 3. Simmer the rhubarb for 10-15 minutes, until the rhubarb becomes very tender (you may see pink pulp sticking to the side of the pot) 4. Take the pot off the heat and cool for 5-10 minutes (this will help with the next step) 5. With a slotted spoon scoop out the rhubarb pieces and discard 6. Strain the liquid from the rhubarb pulp: this is the tricky part! You can do this with either: a) fine wire mesh strainer placed over the top of a wide mouth pitcher or over a bowl, make sure the strainer lays steady and that the liquid will all drain into the container b) place a colander inside a bowl large enough to hold the colander and line the colander with a large sheet of paper towel or cheesecloth 7. Strain the liquid through in batches as needed, the fine pulp can slow down the process, clean it out as needed.... this is the tedious part! 8. Make a simple syrup by bringing one cup of water and one cup of sugar to boil and stir until the sugar is completely dissolved 9. Add the rhubarb liquid, lemon juice and simple syrup together in a pitcher and stir, chill in the refrigerator 10. When ready to serve pour some rhubarb mix into a glass and top off with ice, a shot of vodka and sparkling water 11. Cheers! * the finer the strainer you use, the more pulp that will be removed from the liquid, I usually use a fine mesh strainer but I didn't have one at the cottage so I used a few sheets of paper towel in a colander placed inside a large bowl, worked wonders. It's slower than the mesh strainer but it also removed more pulp, you could do the same with cheesecloth in a colander I'll never forget the first time I saw a pitcher of lemon infused water. I was young and not very worldly, and I was working as a flight attendant for an international airline. Back then we used to serve the passengers water out of plastic pitchers, water poured right out of the tap from the galley onboard the airplane! I kid you not! Can you imagine? This was in the days before everyone started drinking bottled water, well except on the flight to Los Angeles - everyone asked for bottled water on those flights. So one day I was working this flight and one of the senior flight attendants popped a couple of lemon wedges into the water pitcher. Based on the other girls' expressions I wasn't the only crew member wondering about the lemons floating around in the pitcher. I remember thinking "wow, that's a little presumptuous of her to think that everyone wants their water lemon flavoured" but she swore that it would make the stale water taste better. And she was right. With just a hint of lemon the airplane water was transformed into an enjoyable glass of water. It would be years before I would encounter flavour infused water again. I noticed that some of the nicer hotels started providing an icy cold water dispenser for arriving guests during the summer season. It was especially appreciated after traveling all day. Often the pitchers would have sliced lemons, limes or oranges infusing the water. It was so refreshing! Cucumber water however still eluded me until I first experienced it at a day spa. It turns out that spas have been offering their clients cucumber water for ages and ages, because of the cleansing and soothing properties it offers. Cucumber infused water will also provide you with essential vitamins and minerals and besides that, cucumber is crisp and cool and will help you feel that way too! To make this refreshing beverage slice the cucumbers very thin. Thin slices will allow the nutrients and flavours to infuse into the water more readily. And besides, it just looks so pretty when the slices are thin and delicate looking! I also recommend making this ahead of time and popping it in the refrigerator. Cucumber water should be kept cool at all times. In my experience if it's left to warm up to room temperature the cucumbers can become mushy. Serve your water with ice cubes to keep your cucumbers fresh! Oh! And the mint! I like to add mint to my cucumber water. I love the scent of fresh mint right out of the garden and you can have mint available year round - right at your back door. Just plant a bit of mint in a contained area where it's accessible to the kitchen! The mint also adds some sweetness which is so nice with the cucumber flavor and mint also has medicinal properties that will benefit your body. So when the heat outside is turned up treat yourself to a cool refreshing glass of cucumber mint water! INGREDIENTS - cold filtered water - 1/2 cucumber sliced thin - mint leaves DIRECTIONS 1. Add water, cucumber slices and mint leaves in a pitcher 2. Cover and refrigerate for 20 munutes 3. Serve with some cucumber and mint leaves in a glass and top with fresh ice and enjoy! I can't help but think that my grandmother probably made this same cake on more than one occasion. It's the kind of recipe that every lady would have had in her recipe box. I don't particularly remember Grandmother fussing around the kitchen much, but she always baked us angel food cake for our birthdays and made a banana bread and banana sherbet that were legendary. If she was still alive, she would be celebrating her 110th birthday this month. As it was, she celebrated her 100th birthday before passing away. She was a remarkable lady and I could talk for hours about her... maybe another day over coffee I'll share some of her stories. This classic old vanilla cake recipe is quick and easy and it's the perfect way to use up the last of your strawberries, which after all is what inspired me to bake this cake. We had stopped at a berry farm on our way to the cottage and picked a huge box of strawberries. There must have been five pounds of strawberries in that box! We've been eating strawberries for days and days and I made an awesome Strawberry Rhubarb White Wine Sangria to celebrate the start of summer vacation. There is something that is so fun about picking your own berries, maybe it's sneaking a bite of the juiciest berry you've ever seen or showing off to your brother that you just found the biggest strawberry ever, or seeing who can fill up the bucket the fastest. I'm not totally sure, but it's time well spent laughing and giggling and it's memories in the making. INGREDIENTS - 1/3 cup of softened butter, room temperature plus 1 tsp for buttering your pan - 1 cup of sugar - 1 egg - 1/2 cup of milk, plus 2 tbsp milk if needed - 1 tsp vanilla extract - 1 1/3 cups of all-purpose flour - 1 1/2 tsp baking powder - 1 tsp salt - about 12 strawberries hulled and sliced in half DIRECTIONS 1. Preheat the oven to 350 deg F and lightly butter a baking dish (I used a tart dish but a cake pan or deep pie plate would work too) and dust with flour, tapping any excess flour out of the pan 2. In a bowl or mixer cream the butter and sugar until fluffy 3. Mix in the egg and vanilla next and then slowly add in the milk until well blended - you'll probably see little bits of butter but that's normal 4. In a bowl mix the flour, baking powder and salt together and then add it to the batter and mix until the dry ingredients are moist 5. The batter should pour easily and be the consistency of heavy syrup or honey. If the batter is too thick add a tbsp of milk until the consistency is right, if the batter is too runny add a tbsp of flour until the batter is right, someone once said the temperature in your kitchen affects the way the consistency of the batter mixes... okay! 6. Pour the batter into the greased pan and arrange the strawberry halves on top of the cake batter 7. Put it in the oven and bake for 30-35 minutes, or until the cake is golden brown and the top of cake springs back when tapped with a spatula 8. Take it out of the oven and cool on top off a wire rack for 10 minutes 9. Sprinkle icing sugar on top or you can serve it with vanilla ice cream or whipped cream, or just naked like I did here. Enjoy! Serves 8 You will love this light and tasty baked ricotta egg dish. It's similar to a frittata but by skipping the step where you start it in a skillet and finish it in the oven I just pop the whole thing in the oven from the start. So it's not really a frittata, but frittata inspired. It saves time because you don't have to babysit the eggs on the stove top so you're free to be busy with other important things..... like enjoying your morning coffee. But anyway, talking about frittatas, I still remember the first time I heard of a frittata and I remember thinking that it was basically a quiche without a pie crust. Hmmm... no pie crust you say? Genius! Just make a quiche with no crust and you have a frittata! This is the perfect solution for anyone watching their calories or if you just don't have time to whip up a pie crust to make a quiche. Which honestly, I don't usually ever have time for first thing in the morning anyway. In fact, I still owe my husband a fresh baked apple pie.... but that's another story, I'll have to get to that pie another day. So I recently made this ricotta frittata when we were out at the cottage. It was a lazy summer morning and no one was in a rush to go anywhere. Ahhh.... the lazy days of summer. I often have a tub of ricotta cheese in the fridge, it's so versatile so it's pretty much a cottage staple for me. You can use it as a spread, in casseroles, as dessert - see? Super versatile, like this breakfast ricotta bake! This recipe is really simple, I promise - you can whip it up in less time than it takes for your oven to heat up! It whips up creamy smooth and smells heavenly while baking in the oven. You can play around with the ingredients, this recipe is very forgiving, add mushrooms, onions, ham, the possibilities are endless! But one thing that I know is that you'll have those sleepy heads coming down from the bedroom in no time! INGREDIENTS - 2 cups ricotta cheese - 4 eggs - 1/2 pint cherry tomatoes - fresh spinach - 2 tbsp parmesan cheese - 1 garlic clove crushed and finely chopped or grated - pinch of kosher salt - fresh black pepper - finely chopped basil or dried basil leaves - finely chopped parley or dried parsley - butter or oil for greasing pan DIRECTIONS 1. Preheat oven to 350 degrees 2. Keep 4 tbsp of ricotta cheese aside for topping, and whisk together eggs and remaining ricotta cheese until well blended and airy 3. Whisk in parmesan cheese, garlic, salt, pepper and herbs 3. Pour the egg & ricotta mixture into a greased pie dish and place tomatoes, spinach, dollops of ricotta and parmesan on top 4. Bake in the oven for 30-35 minutes or until the egg & ricotta mixture is set and cooked through 5. Serve warm from the oven and enjoy! Serves 4 Strawberry season is in full swing so it's time for me to make my Strawberry Rhubarb Sangria! I love a classic red wine sangria as much as the next girl but let's be honest, I can't serve red wine sangria all summer long, right? Right! Like any savvy girl I have a few favorite sangria recipes up my sleeve, like this Stawberry Rhubarb White Wine Sangria. The major inspiration for this fruity white wine sangria is that it's strawberry season! Yay! Strawberry season around here is pretty short-lived so I try to make the most of it each year by using it in just about everything I make. True story. Rhubarb season on the other hand stretches all summer long, which means it's pretty much available in any backyard garden all of the time. It's no wonder why strawberry rhubarb is such a classic summer flavor: rhubarb with it's beautiful tart dark pink stalks and strawberries with their bright red color and sweet flavor, both ready in the garden in the same season. It was just naturally instinctive to try a crisp white sangria with strawberries and rhubarb. It's tart, it's sweet, and reminds me of homemade pie. Strawberry season signals the start of the summer. It ties in with the last day of school and the start of camping season. I celebrated our first day out at the lake this summer by making a pitcher of this delightful sangria. I shared it with my mother-in-law and my husband's aunt who was visiting and brought a pitcher down to the dock at our neighbours. Let's just say that everyone was happy to see me! Haha! These gorgeous strawberries were picked locally and the garden rhubarb came out of my garden. Together they make a delicious sangria! This drink will be sure to please any white wine drinker and you may even convert a few red wine drinkers too! INGREDIENTS - 8 rhubarb stalks chopped, about 2 cups - 1 pint of strawberries, hulled and sliced - 1/2 cup of blueberries - 1/4 cup of sugar (optional) - 1 bottle of white wine - 1/4 cup of Triple Sec or other liqueur such as Brandy - 1 bottle of sparkling water, or soda water in a pinch DIRECTIONS 1. In a medium saucepan bring about 2 cups of fresh water to boil 2. Add chopped rhubarb and half of the strawberries and reduce the heat to medium low 3. Simmer the rhubarb and strawberries until the rhubarb becomes very tender, about 10 minutes and let cool for 10 minutes, you don't want to work with it when it's too hot 4. In a fine colander or mesh strainer drain the liquid into a pitcher and discard the rhubarb and strawberry pulp, you can then strain the liquid through a cheesecloth to remove even the tiniest pieces if you wish, but this step is optional 5. Add the bottle of white wine to the strawberry rhubarb liquid and stir 6. Return the pot to the stove and add 1/4 cup of sugar and 1/4 cup of water to make a simple sugar, once the sugar has dissolved you can add some or all of it it to the mix, start off with half of the simple syrup and taste and add more if desired, or just add all of it if you like a sweet sangria 7. Add the rest of the strawberries and blueberries and any fruit of your choice and the Triple Sec and refrigerate for four hours or until completely chilled 8. When ready to serve add a tray of ice cubes and top off with sparkling water 9. When serving the sangria spoon out some of the fruit and ice if it doesn't pour into the glasses and enjoy! It's the holiday weekend and it's time to celebrate! My kids LOVE ice cream and they especially love ice cream cones. They're sweet, delicious and fun to eat, there's no wonder they're so good. But if you have little ones you know how messy ice cream can be when it melts away faster than they can eat them. The ice cream starts dripping down the sides as a parent nearby is urgently encouraging the child to lick the melting treat and lick those drips! before the ice cream comes flooding down the side of the cone. One drip at a time and then they're covered. You've seen it, I'm sure, they're all dressed up for a party and they get their adorable little outfits all covered in ice cream! These cute cannoli inspired vanilla cones are delicious and taste like soft serve vanilla ice cream from the ice cream shop. Seriously! Try them! I don't add a lot of sugar, I find that by the time you put the ricotta in a sugar cone and add sprinkles on top that the amount of sweetness is perfect. My boys gobbled these up in a flash! But if you have a real sweet tooth taste the cannoli mixture and add more sugar as you need, but trust me, you won't need a lot! These vanilla cones are easy to whip up and perfect for serving to a crowd. You can prep the ricotta ahead of time and keep it in a covered bowl in the fridge then put them together right before serving. I wouldn't put them together ahead of time because the cones may get soggy and the colors from the sprinkles may start to melt into the ricotta.... and no one wants a soggy ice cream cone! So I'm guessing that by now you know what I'm talking about and that you probably have one of those friends whose darling children are always perfectly dressed in the cutest little outfits. Help her out this holiday weekend and serve these cones. I promise, Mama will say yes to these cannoli vanilla cones! INGREDIENTS - 2 cups of ricotta cheese - dash of pure vanilla extract - 3 tbsp of powdered sugar/icing sugar - coloured sprinkles, or other toppings of your choice - sugar cones DIRECTIONS 1. In a bow mix together ricotta cheese, vanilla and sugar until well mixed and a bit fluffy - taste and add more sugar if desired 2. Spoon cheese mixture into cones and add sprinkles! 3. Enjoy! |
AuthorWife, mother and pilot, with a passion for good food. Archives
November 2016
Categories
All
https://foodgawker.com/?author=love+good+food
|









 RSS Feed

